Recipes
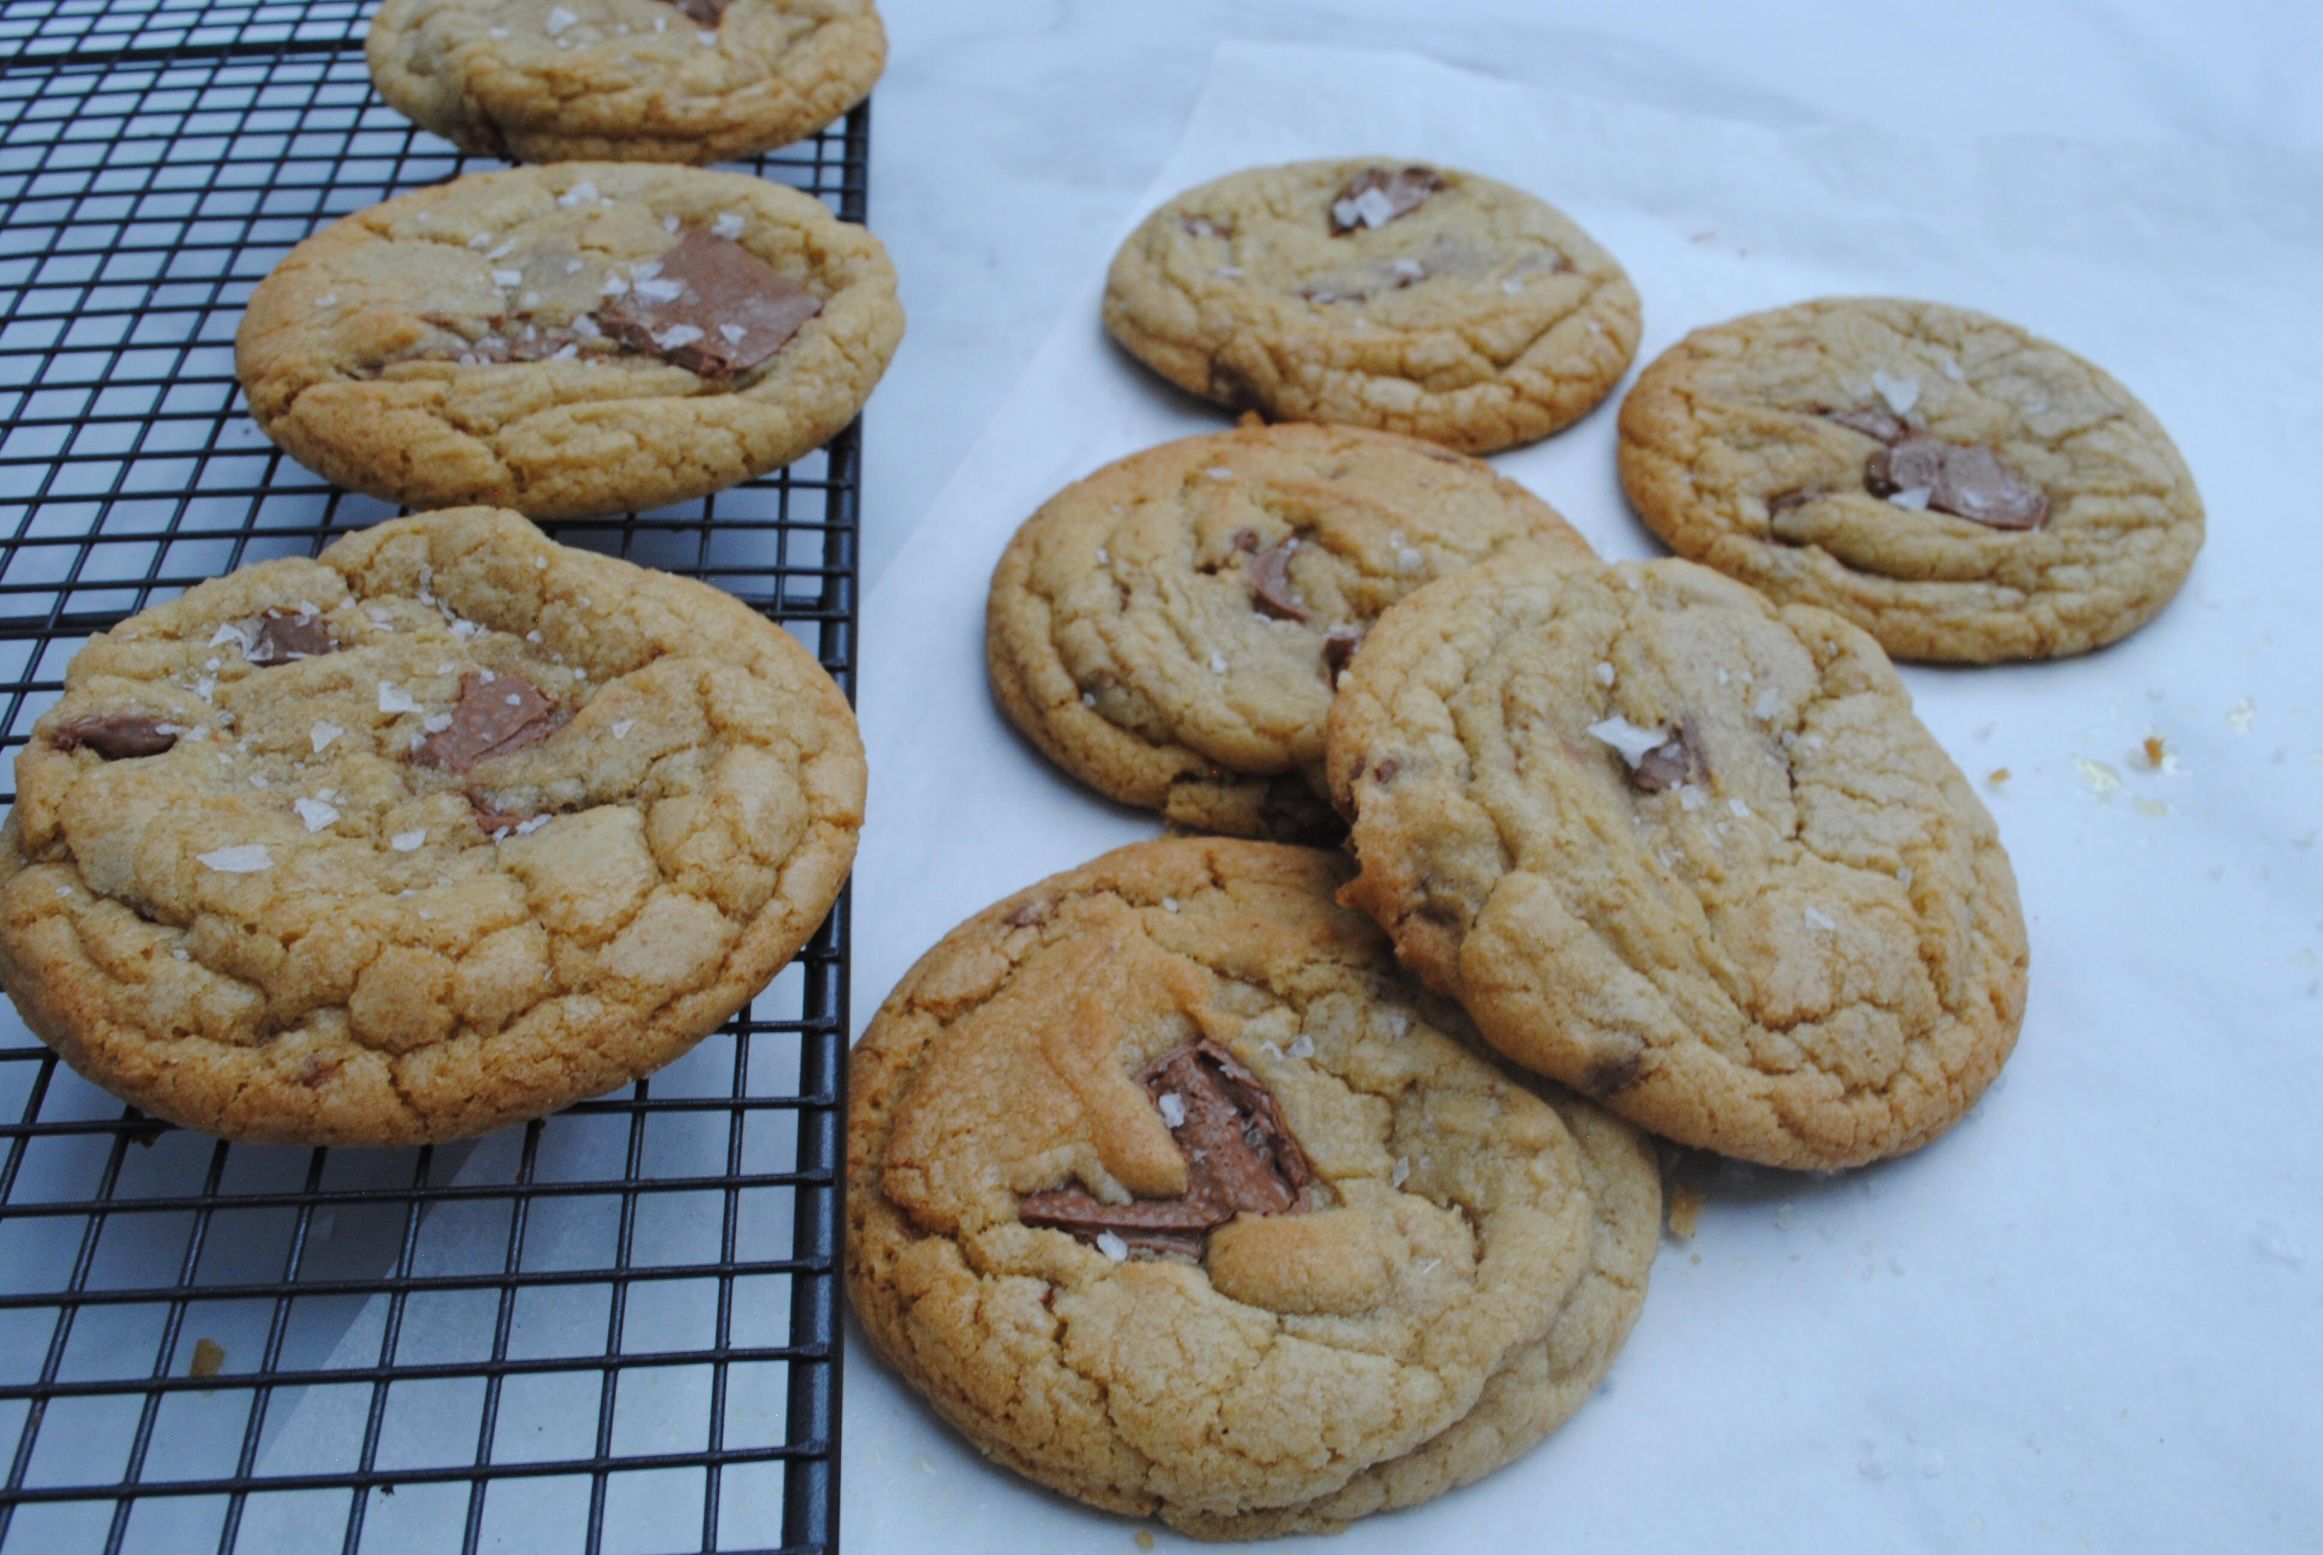
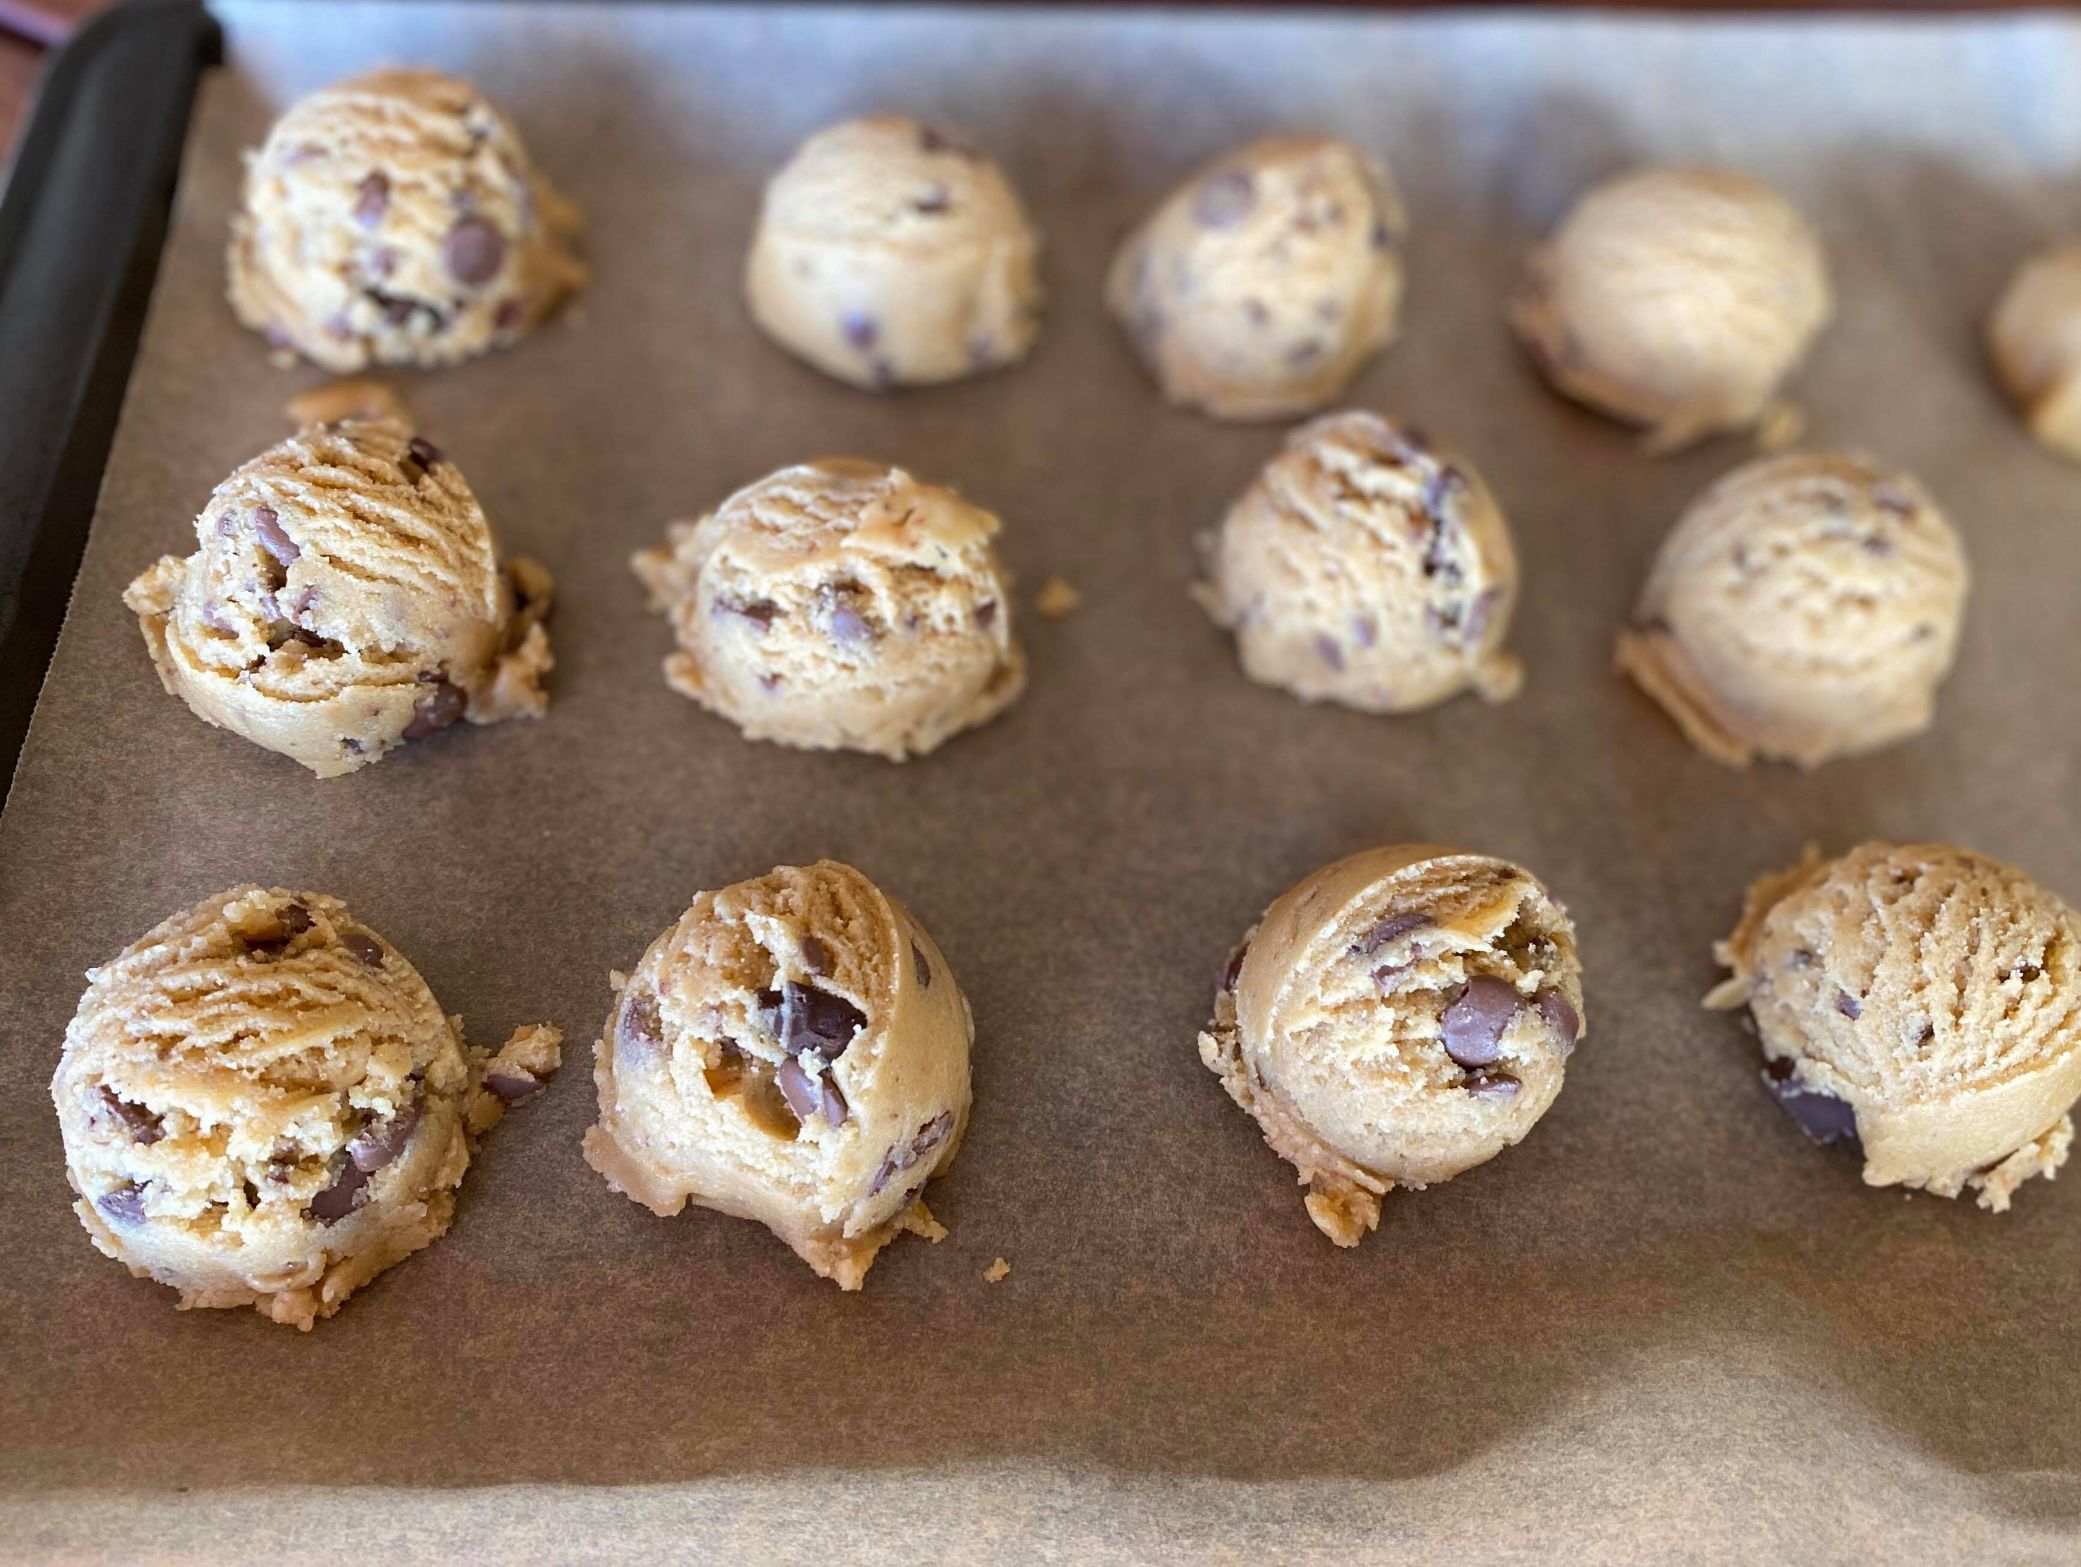
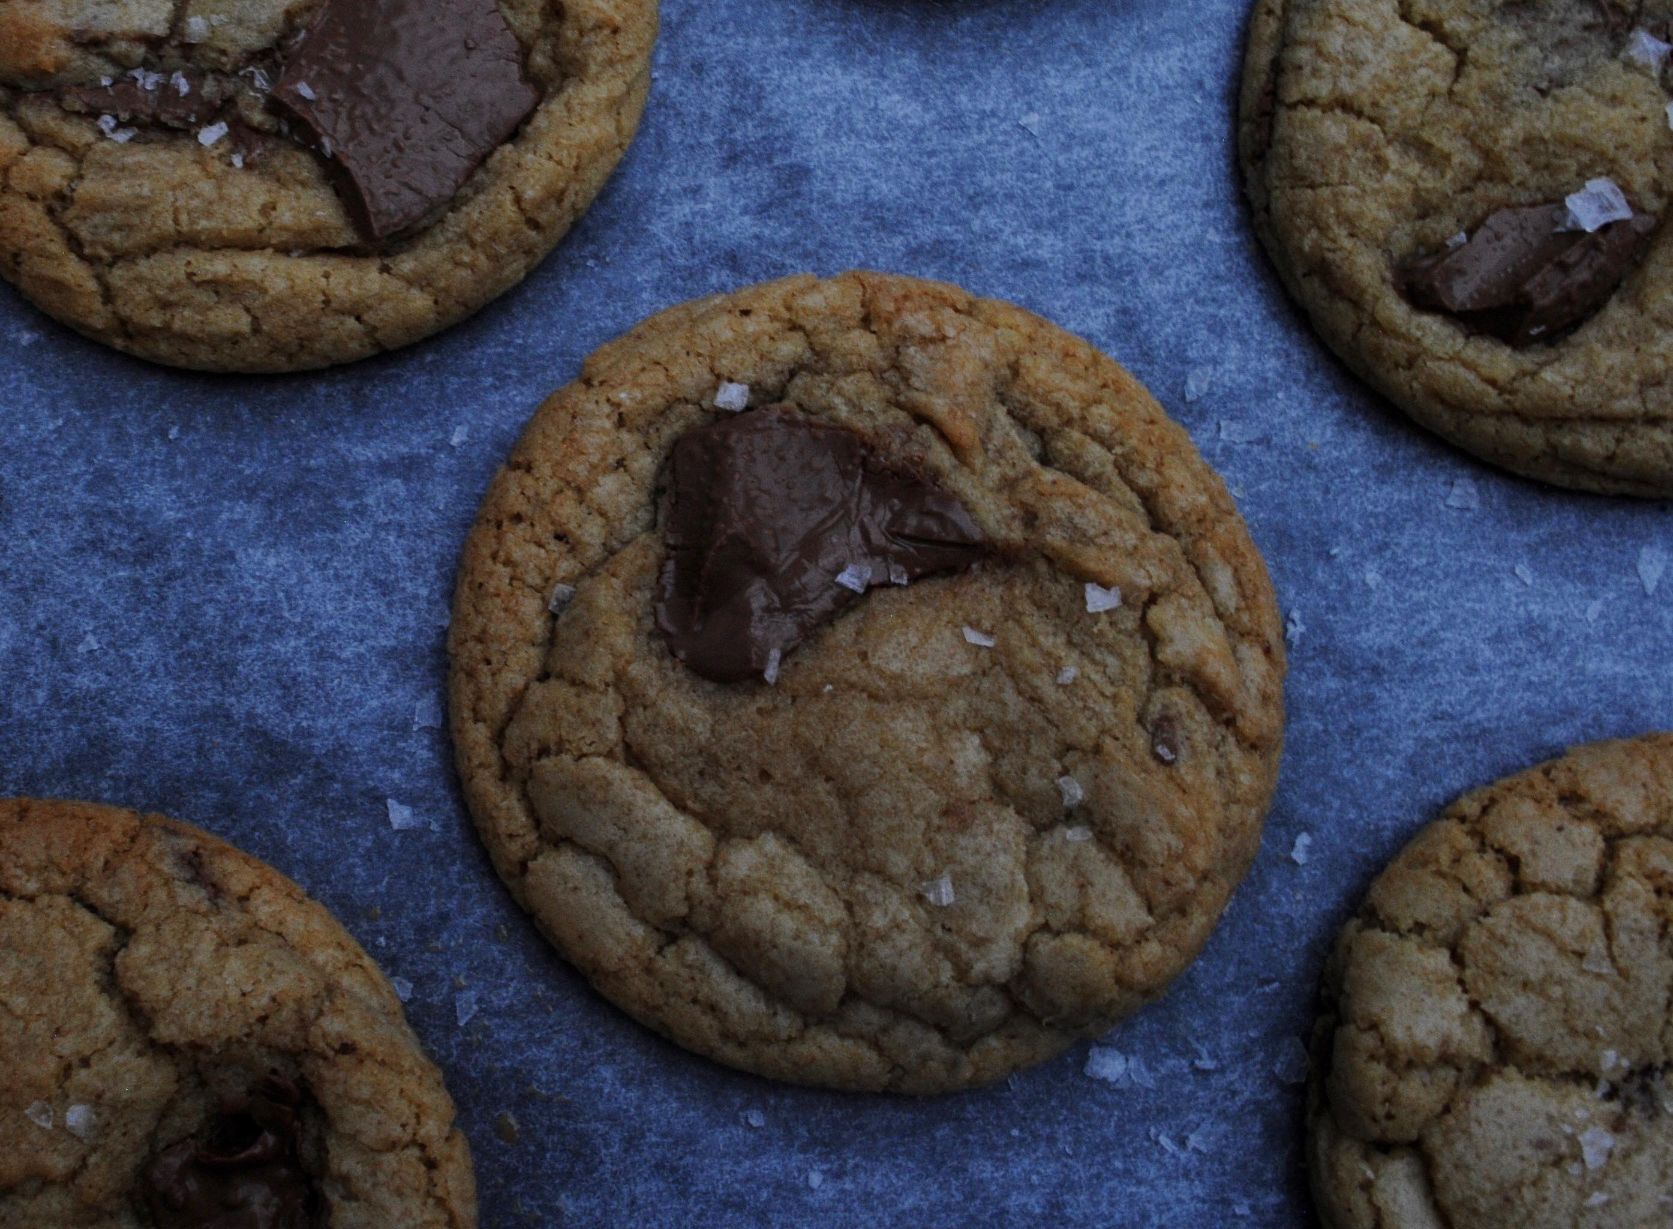
Sweet Libby’s Burnt Butter Chocolate Chip Cookies
Ingredients
225g Butter 200g (1 Cup) Brown Sugar 135g (2/3 Cup) Caster Sugar 2 Eggs 1tsp Vanilla essence 360g (2 ¾ Cup) Plain Flour 1 Tbs Cornflour (optional) 1 tsp Baking powder 1 tsp baking Soda 180g Dark Chocolate chips/ Block of chocolate chopped/ Easter eggs. Good quality Salt
Method
1. Burn your butter – Place the butter into a small saucepan over medium heat, agitate until the butter is melted. When the butter has melted it will begin to bubble (don’t worry this is meant to happen), keep it simmering until it smells nutty and the solids at the bottom begin to brown. Don’t get too nervous here as all you are doing is adding an extra rich nutty flavour – you can’t go too wrong! Remove from the heat and let it cool to room temperature. 2. If you are short of time instead of burning the butter use softened butter – the flavour just won’t be the as delicious. 3. Measure the ingredients – in one bowl combine the caster and brown sugar. In a second bowl, weigh out the plain flour, cornflour, baking soda and baking powder. (Pro tip – cornflour is optional I love using it in cookies as it I find it gives them a nicer “crumb”, but if you don’t have any don’t let it stop you making this recipe). 4. Mix it up – Mix the cooled burnt butter with the sugar and combine well. (If you can’t be bothered to wait for the butter to cool completely, that is okay, but it just means you will have to wait a bit longer for the dough to rest in the fridge before scooping). Add the eggs one at a time along with the vanilla whisking the mixture until it becomes glossy. You may still have sugar granules but this is okay although you do want the mixture to start to look a bit lighter in colour. 5. Wet to dry – now its time to add the flour mixture into the combined wet butter and eggs. This time you just use a spoon, or if you are using a mix master make sure to slow down the speed as the flour will fly everywhere. You don’t want to over mix here but to make sure it is a bit chewy you have to ensure all the flour is thoroughly combined. 6. Add the chocolate – Self explanatory just add the chocolate. 7. Rest the dough and prep the oven – I think it is important to rest the dough for 30 mins. This helps set the butter but also allows the gluten in the flour to rest if you have accidentally over mixed it. Now pre-heat the oven on fan-forced to 180C and line two trays with baking paper. 8. Scoop it up – Depending on what equipment you have its time to portion your cookies. I use an ice cream scoop as I love the look and I think it makes a great size but just any dessertspoon will do. Roll the dough into a ball and lay them on the lined tray (depending on your scoop size give these cookies room to spread). I normally make sure I have reserved a couple of pieces of the chocolate so I can put some chunks on top before I pop them in the oven – remember “we eat with our eyes”. 9. Cook them – Place into the oven for roughly 15-20 mins depending on your oven and how you like them cooked. If I am making them for me keep them quite blonde (under cooked) and I like them softer, but if I am sending some to my mum I always leave them in for an extra 5 mins. 10. Let them cool on the tray so the edges get crispy 11. Sprinkle with sea salt and ENJOY!
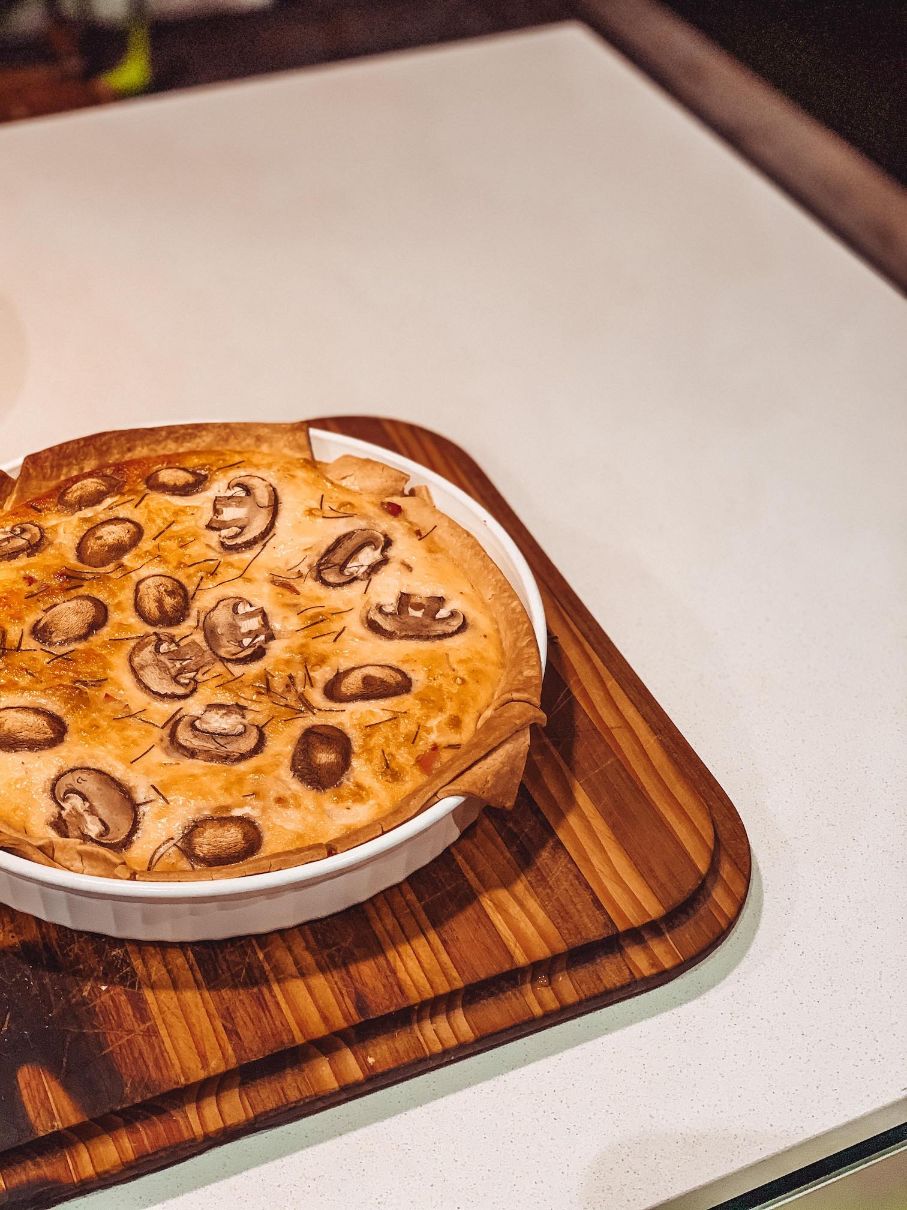
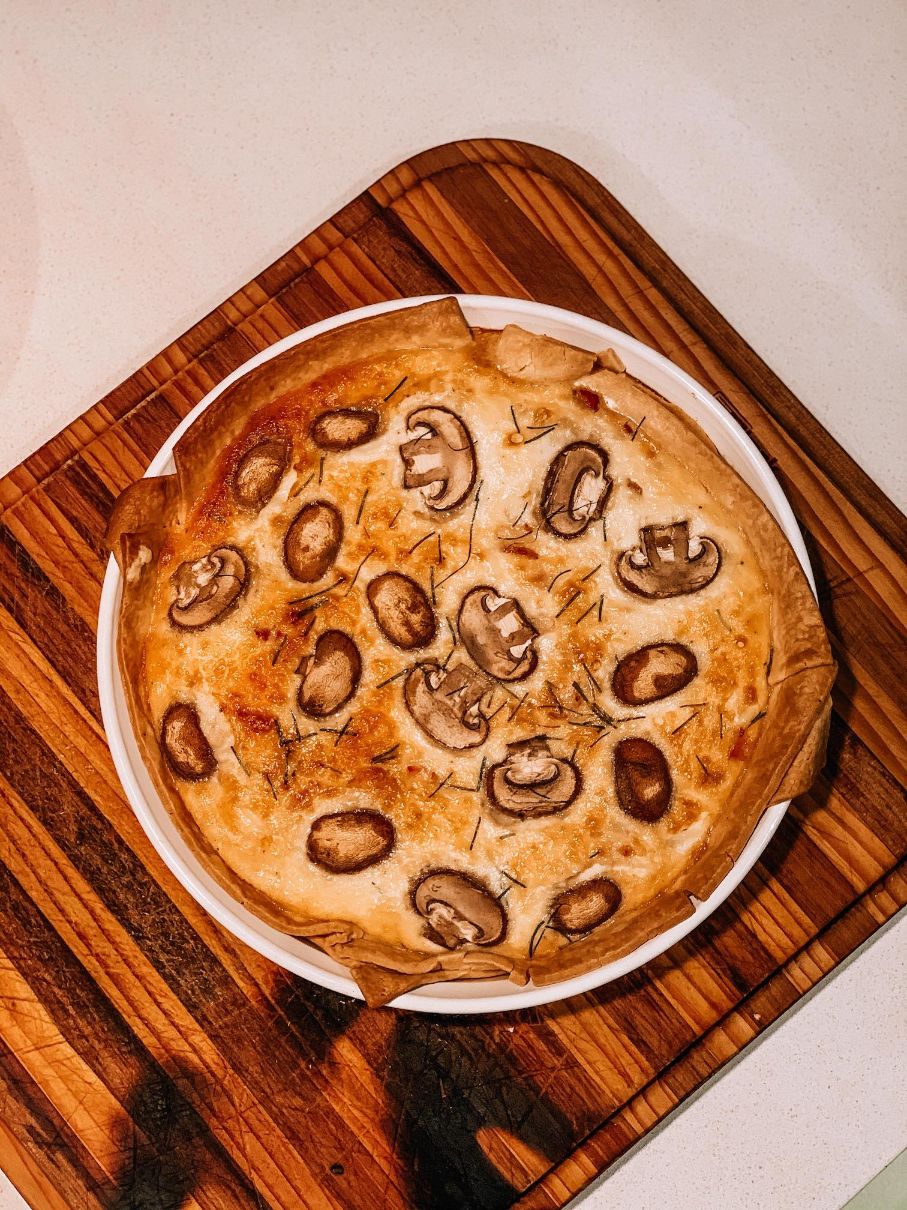
Bea's Quiche lorraine
Serves 6 or 4 depending on how hungry
Ingredients
Baking paper Quiche/pie tin 2 sheets of shortcrust pastry 300ml cream 4 eggs 1 brown onion 6 rashes of short cut bacon 1/2 cup grated cheese (of your choice but we use cheddar) Handful of small mushrooms sliced Chives for seasoning
Method
1. Take the pastry out of freezer and place on the bench to defrost 2. Preheat oven to 180 degrees fan-forced 3. Once the pastry has defrosted and is malleable line tin with pastry making whole tin including sides are covered 4. Line pastry with baking paper and fill with ceramic weights or rice then bake for 10mins 5. Take the tray out from the oven and remove weights and baking paper, then bake for a further 5mins or until lightly golden 6. While the pastry is cooking sauté onion and bacon in a pan for about 5mins (don’t cook completely as it will cook in the quiche) then set aside to cool 7. While fillings and pastry are cooling combine eggs, cream, salt and pepper in a mixing bowl and whisk 8. Spoon bacon and onion mixture along with cheese into pastry shell then pour in cream and egg mixture 9. Place raw mushrooms on top along with chives 10. Cook in the oven for 45mins or until set, then stand for 5 mins before serving
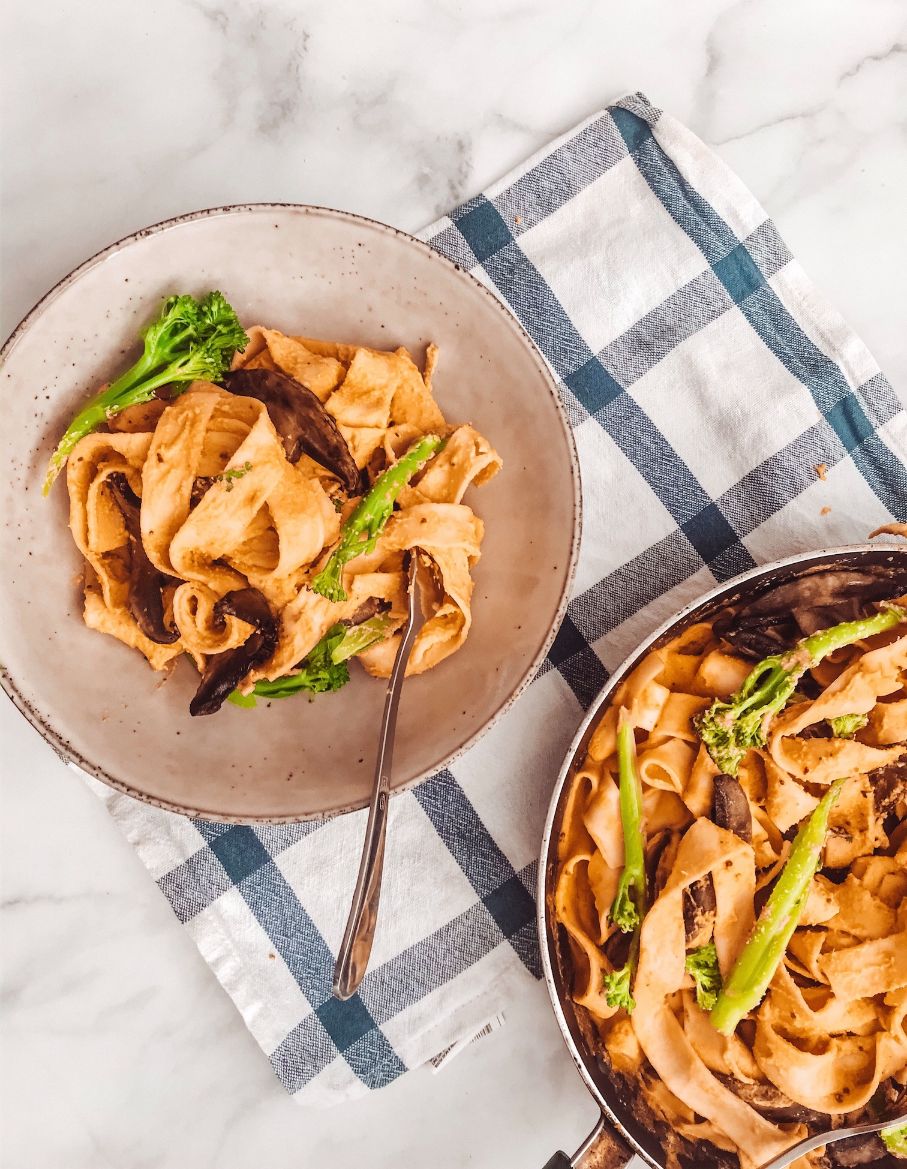
Vegan Mac & Cheese
Serves 4
Ingredients
125g of raw Cashews
120g Sweet potato
1 small Carrot
½ White Onion
25g Nutritional Yeast
1Tbs Apple Cider Vinegar
1Tbs Seeded Mustard (optional)
150ml Water
1tsp Turmeric
1tsp Garlic powder (can use fresh is you cook it down for a bit)
1tsp Smoked paprika (optional)
400g of your favourite vegan Pasta (I used a non vegan Pappardelle, which is
super delicious but to make it vegan you will find plenty of eggless options in
the super market)
1 Bunch Broccolini
2 handfuls of any Mushroom
Salt & Pepper
Method
1. Soak the cashews - This is normally done over night in cold water, which you can do if you are more organised than me. However I normally just pop them in some boiling water for 20mins or so while the other veggies cook. 2. Boil the carrot, onion and sweet potato – might seem weird but put all the veggies in some boiling water and cook till tender. 3 minutes before you drain them quickly pop the broccolini on top of the boiling water after 2 minutes scoop them out separately and put them on a plate for later. 3. Blend the sauce – Once veggies (carrot, onion, sweet potato) are cooked add them into a food processor, blender or nutria bullet etc along with the cashews, the yeast, vinegar, mustard, water, turmeric, garlic powder, smoked paprika, big pinch of Salt and blend till smooth and creamy. 4. Cook Mushrooms– fry the mushrooms quickly in a small pan - make sure you add a bit of salt, and oil when you fry it up. Makes all the difference in flavor. 5. Cook Pasta – Follow packet instructions, till al-dente. 6. Put it all together – In whatever pan you have that fits throw in the pasta (white a bit of the excess pasta water) and the creamy sauce, toss as best you can so each pasta strand is covered. Then add the mushrooms and broccolini cook for one minute to bring it all together, and serve.